
We aren’t all built the same way. We are all different shapes and sizes and each have our own way of snowboarding. For this reason there isn’t one ultimate snowboard stance that will suit everyone.
However, when you’re just starting out it’s helpful to have some guidance and be pointed in the right direction.
In this article I explain how to correctly determine your snowboard stance and attach your bindings to the snowboard. I explain stance direction, setback, width and angles along with several other minor adjustments you can make to your snowboard.
These adjustments will ensure you feel comfortable whilst riding and ultimately improve your snowboarding performance.
Disclaimer: Some links in this article are affiliate links, which means that if you purchase through them I receive a small commission, at no extra cost to you. This helps cover the cost of running this blog. Thanks for your support!
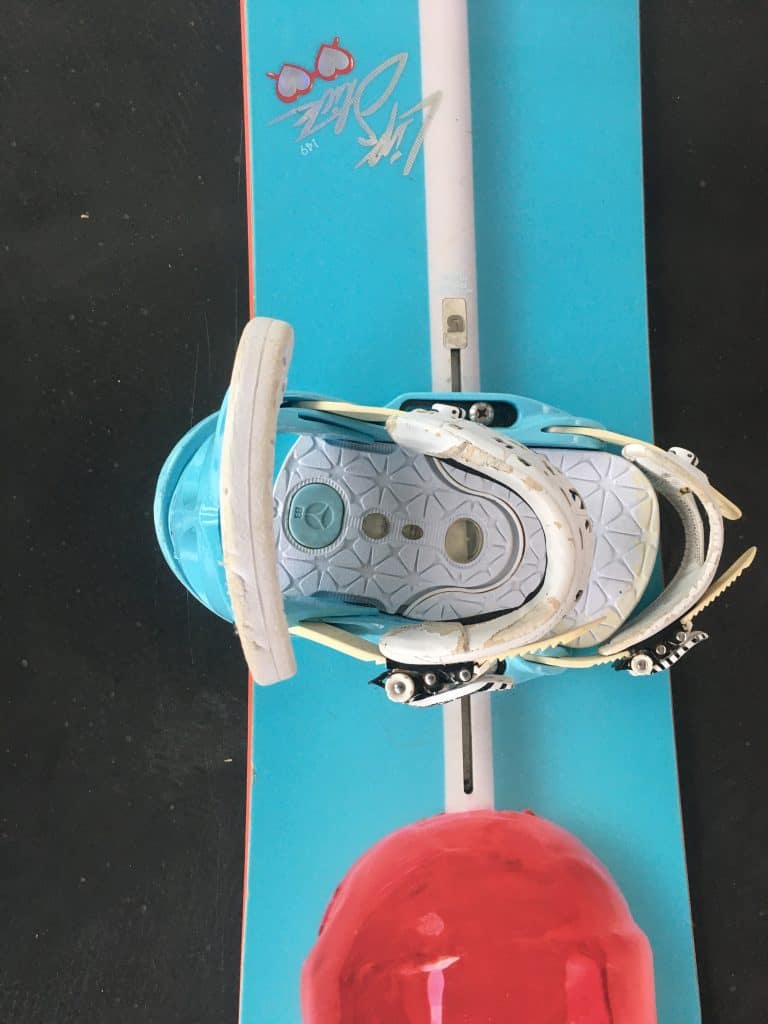
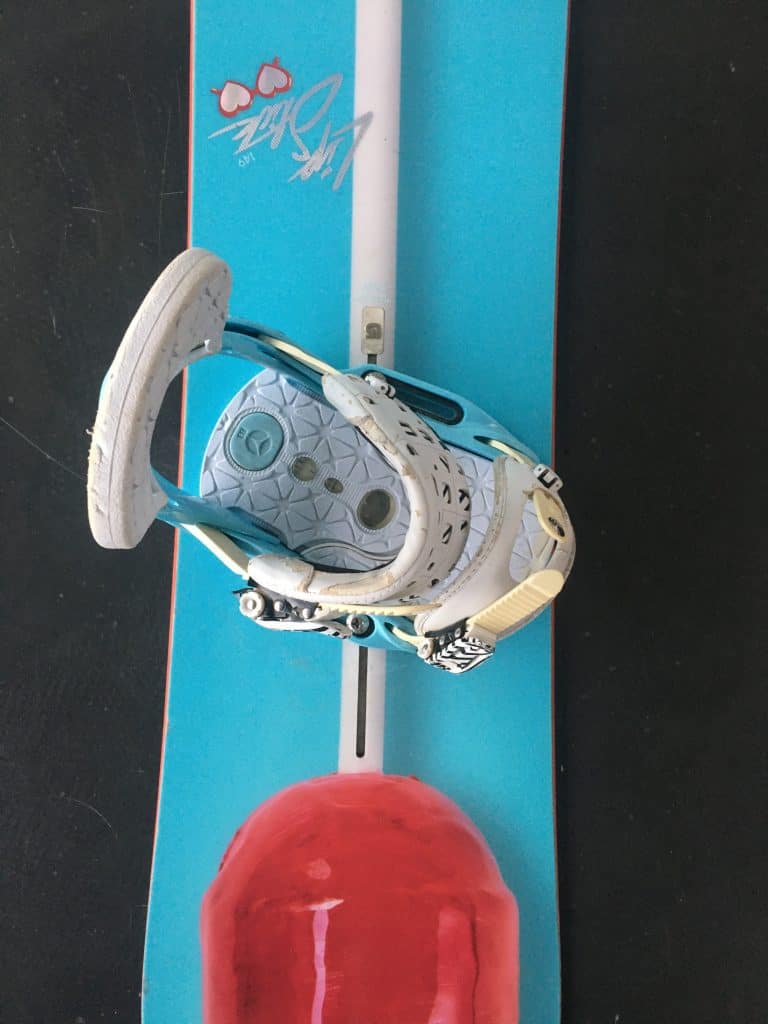
Snowboard Binding Set Up
Once you’ve purchased your boots, board and bindings it’s time to start putting them all together. It’s important to take the time to setup up your snowboard before you get to the snow.
Tools required to setup your snowboard:
In order to setup your stance correctly, you will need a flat surface.
6 Factors Affecting Snowboard Stance
There are 6 factors to consider when determining your stance on a snowboard and it makes sense to work through these in the order I’ve set out below.
1. What direction should I stand – goofy or regular?
When you’re a beginner snowboarder the first thing you need to decide is which direction you will stand ie. which foot will be at the front and which foot will be at the back.
Snowboarding with your left foot forward is known as regular footed and snowboarding with your right foot forward is known as goofy footed. Or regular and goofy for short.
Choosing which foot to have at the front might be obvious or it might take some figuring out. It might be as simple as imagining yourself snowboarding down a hill and picturing which way you see yourself riding. Or if you skateboard or surf for example, you will already have a preferred riding stance.
If you’re not sure though, typically your more dominant foot will be at the back. For example if you kick a football with your right foot, this is most likely to be your back foot.
There are a few fun tests you can do to help you decide too. Standing on a medium sized step, allow yourself to fall forwards then at the last minute put a foot out to stop yourself. Whichever foot you put out is likely to be your front foot. Alternatively, find a friend to gently push you from behind when your not fully expecting it. Whichever foot you put forward will likely be your front foot.
Finally, just remember that your back foot will be the foot you skate with when you only have one foot strapped into the board. Picturing how you will skate, like you would on a skateboard, could also help you decide.
Where does the term goofy come from? The term goofy is adopted from surfing. A common theory is that it came about when Goofy appeared in a Disney film where he was surfing with his right foot forward. Sadly that’s not true. In the film he actually surfs in both directions, as do several other characters. It’s more likely the term came about purely because surfing with your right foot forward was more uncommon and was perceived to be silly or strange, another word for which was goofy.
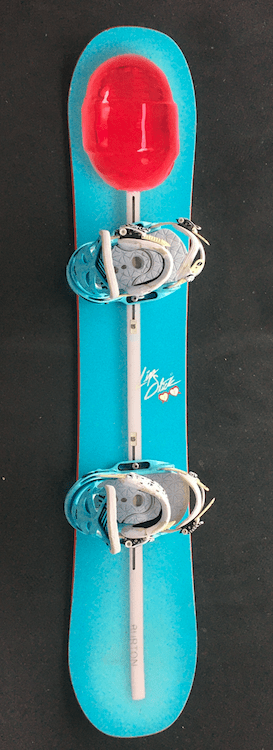
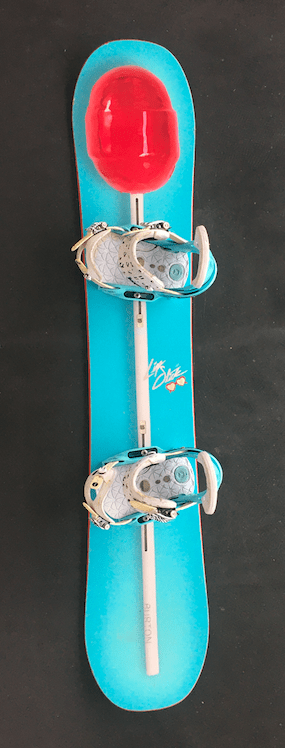
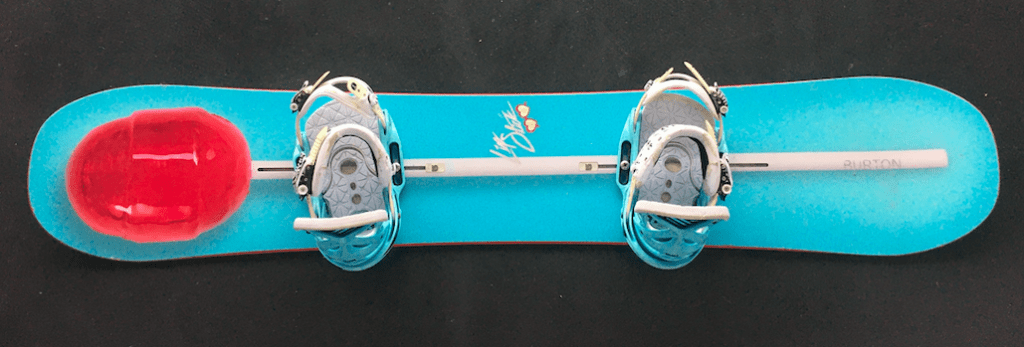
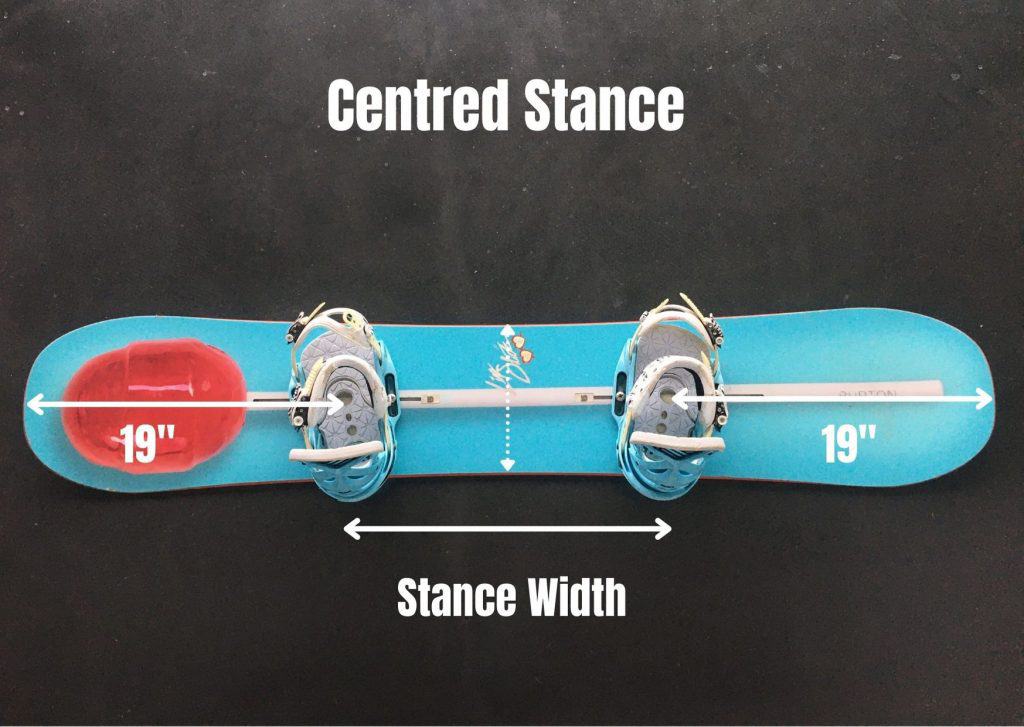
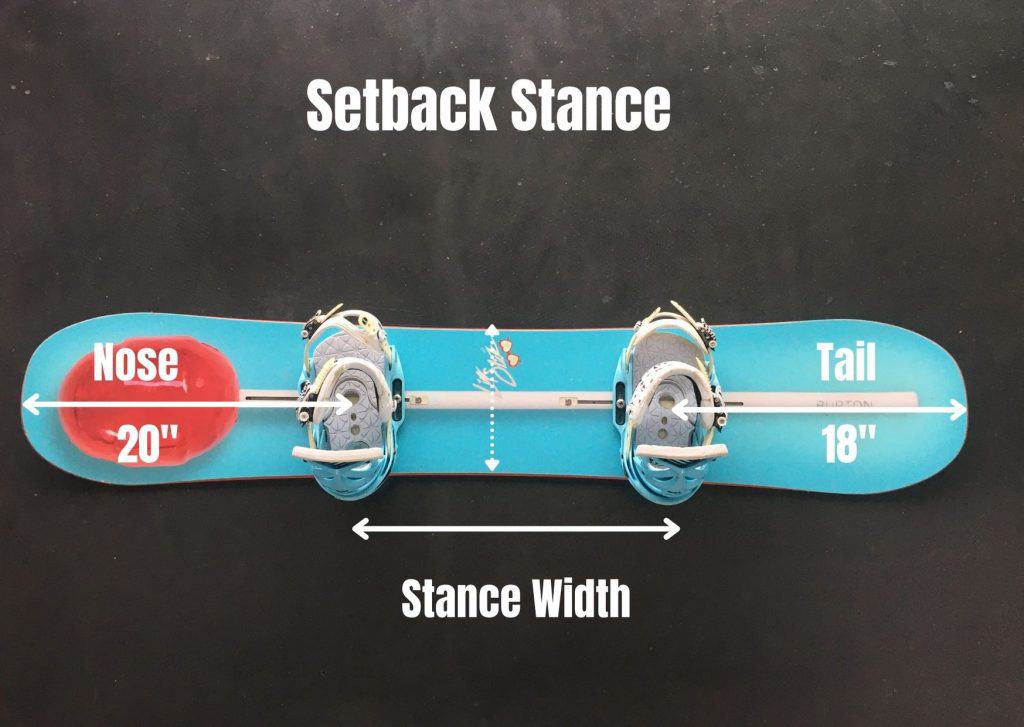
2. Centred or setback (offset) snowboard stance
Centred
A centred stance means there is the same distance from the nose to the centre of the board as there is from the tail to the centre of the board.
Your weight is completely even from nose to tail. Board control, turns and switch riding feel easy with a centred stance.
Centred stances are preferred by freestyle riders who spend a lot of time riding switch and are used on twin snowboards. See this guide to learn about the different snowboard shapes.
Setback
A setback or offset stance means the whole stance is shifted towards the tail of the board. So the distance from the back binding to the tail is shorter than the distance from the front binding to the nose.
Your weight will be shifted towards the tail of the board. Ollies (jumps), float in powder and explosion out of a turn will feel easy with a setback stance.
Stances that are setback are more suited to freeride snowboarders who typically only ride in one direction and require the nose to be lifted up out of the deep snow (since most of the weight is over the tail).
It could be that you change your stance depending on which board you’re riding or what type of riding you’ll be doing that day. I’ve accrued several boards over the years, so tend to keep some boards set back for riding powder and some centred for playful park or groomer days.
Reference Stance
Printed on most snowboards you can find the reference stance, which is specific to that snowboard’s model, size and sidecut. This is the stance around which the snowboard has been designed. Whilst riding in the reference stance is not critical, it will allow the snowboard to perform at its peak.
A true twin board will have a reference stance that is centred over the board, whereas a directional board will have a reference stance that is slightly setback towards the tail. This corresponds to the sidecut of the snowboard. I explain how to understand snowboard sidecut in this article.
If you prefer a wider or narrower stance than that of the reference stance, you must move both bindings in or out by the same distance. For example, to achieve a narrower stance move the front binding in one hole and the back binding in one hole.
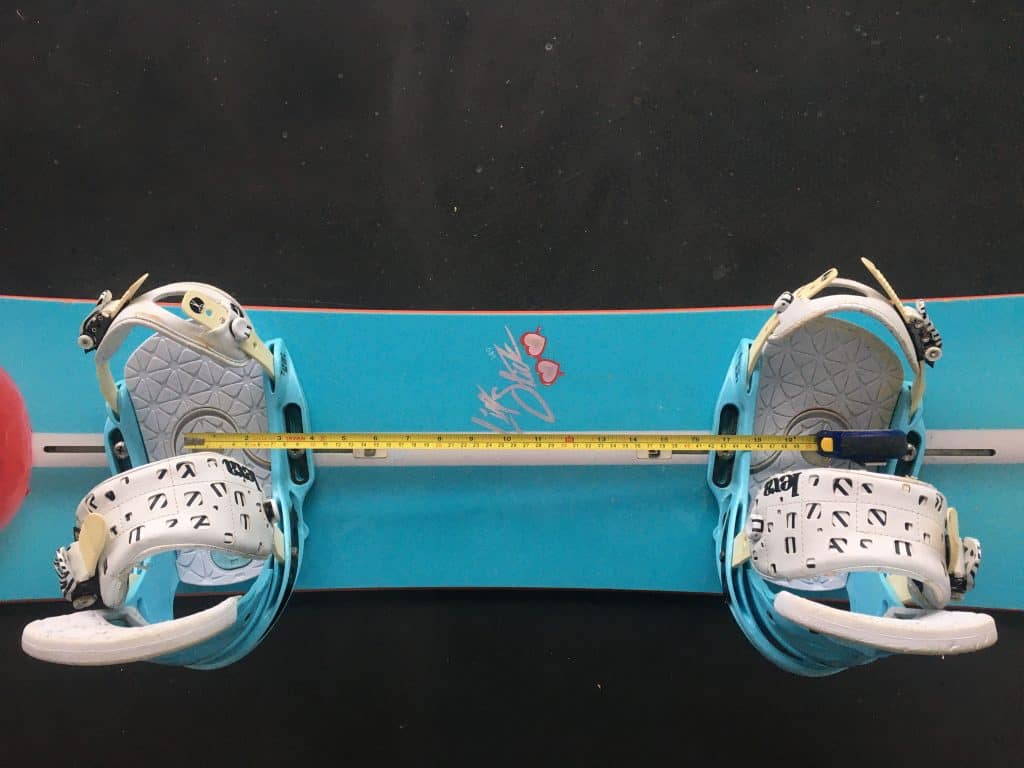
3. What is my snowboarding stance width?
Stance width on a snowboard is the distance between the centre of each binding. It determines how far apart your boots will be once you’re strapped onto your board.
As a rough guide, your snowboard stance will be just slightly wider than shoulder width, so the knees are bent in an athletic position.
A wide snowboard stance will provide more stability since your centre of gravity is forced lower to the ground. However, if your snowboard stance is too wide you will find manoeuvring the board very difficult and slow.
A narrow stance will allow you to turn sharply from edge to edge as your weight can be quickly pivoted through your hips. However, if your snowboard stance is too narrow the board will feel unstable and difficult to control.
As with many things, stance width is a personal preference and will likely develop as your snowboarding progresses. The type of riding you do, or your riding style, will often influence your snowboard stance width. Freestyle riders may prefer a slightly wider stance for more stability whilst jumping, whereas freeriders may prefer a slightly narrower stance for easier manoeuvrability.
As a beginner, if you’re still unsure you can use this stance width table as a guide.
| Snowboarder Height | Recommended Stance Width |
| 5’1″ / 155cm | 17-19″ / 43-48cm |
| 5’2-5’4″ / 156-163cm | 19-21″ / 48-54cm |
| 5’5-5’8″ / 164-172cm | 20-23″ / 48-56cm |
| 5’9-6″ / 173-184cm | 21-23″ / 53-58cm |
| 6’1-6’4″ / 185-193cm | 22-24″ / 56-61cm |
| Taller than 6’4″ / 193cm | 23-25″ / 58-63.5cm |
4. What Snowboard binding angles should I use?
Snowboard binding angles are an important factor in your snowboard stance. Your knees and hips both align over your feet, so the angle of your feet in relation to the board will affect how you move.
Again snowboard bindings angles differ depending on what type of riding you prefer to do and there are a huge number of combinations to try. Snowboards bindings come with the ability to adjust angles between +30 and -30 degrees. This is displayed on the binding disc for standard bindings or in the small bubble on EST bindings.
With the binding perpendicular to the edge, the binding will have an angle of 0 degrees. All riders will want their front binding pointing towards the nose of the board. This will be a positive angle. Somewhere between 10 and 21 degrees is quite common for all-mountain riding.
The angle of the back binding however can be positive, zero or negative. This angle is very much dependent on the type of riding you do. With the back binding pointing towards the tail of the board, a negative angle is shown. With the back binding pointing towards the nose of the board, a positive angle is shown.
Some popular stance angles include:
1. Duck +15/-15
This is commonly used by freestyle snowboarders since the angles make riding switch as comfortable as riding regular.
2. Neutral +15/0
This is often recommended for beginners since the focus is riding comfortably in one direction only.
3. Aggressive Freeride +25/+6
Freeriders like Jeremy Jones are concerned with charging the mountain in one direction so a forward stance (where both bindings have a positive angle) is preferred.
5. What about setting snowboard binding position across the board?
Before you screw in the bindings you just need to check there is no overhang with the front of the binding over the toe edge, or the back of the binding over the heel edge. With the boot in place there might be a little overhang but not too much otherwise it will drag in the snow.
This usually isn’t an issue unless you have large feet. If you find the binding hangs over the edges regardless of how you position the binding you may need to use a wide snowboard.
6. What highback adjustments should I use?
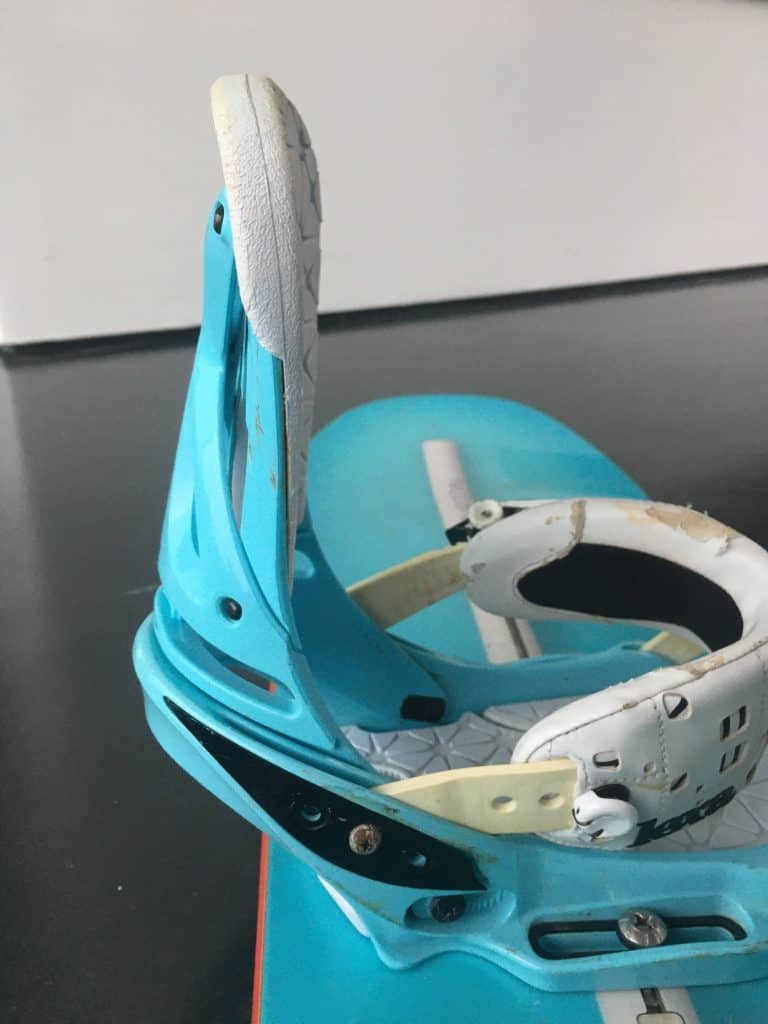
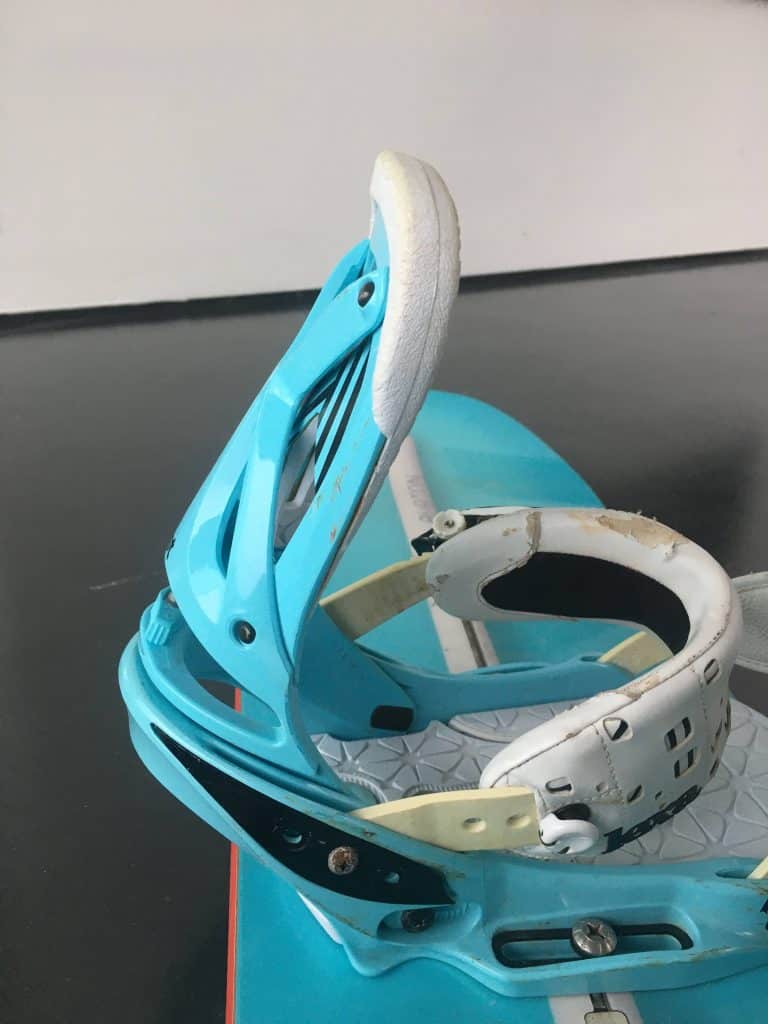
Forward lean
Highbacks are the back part of the snowboard binding that your lower leg leans up against. Leaning against highbacks allows for inclination of the board on your heel edge turn. Forward lean refers to the angle at which the highback sits in relation to the snowboard.
Standing in an athletic position whilst snowboarding means your knees will be flexed slightly. Many snowboarders, particularly freeriders and half-pipe riders, want the highback tilted forward towards the board in order to mirror the flexion in the lower leg.
This can provide greater control at higher speeds and improve carving. A large forward lean angle can increase leg fatigue as your knees are forced forward into a more aggressive stance.
Having the highback set with zero forward lean (perpendicular to the board) provides more room for error and is often recommended for beginners. It’s also preferred by freestyle riders as it’s more forgiving when landing jumps or riding rails.
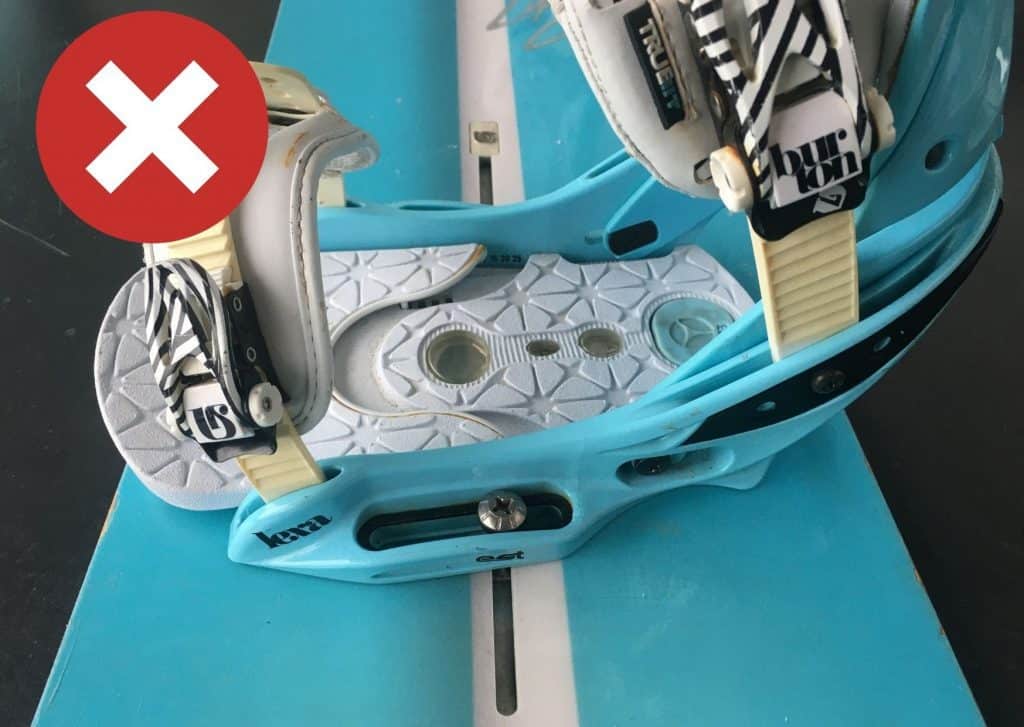
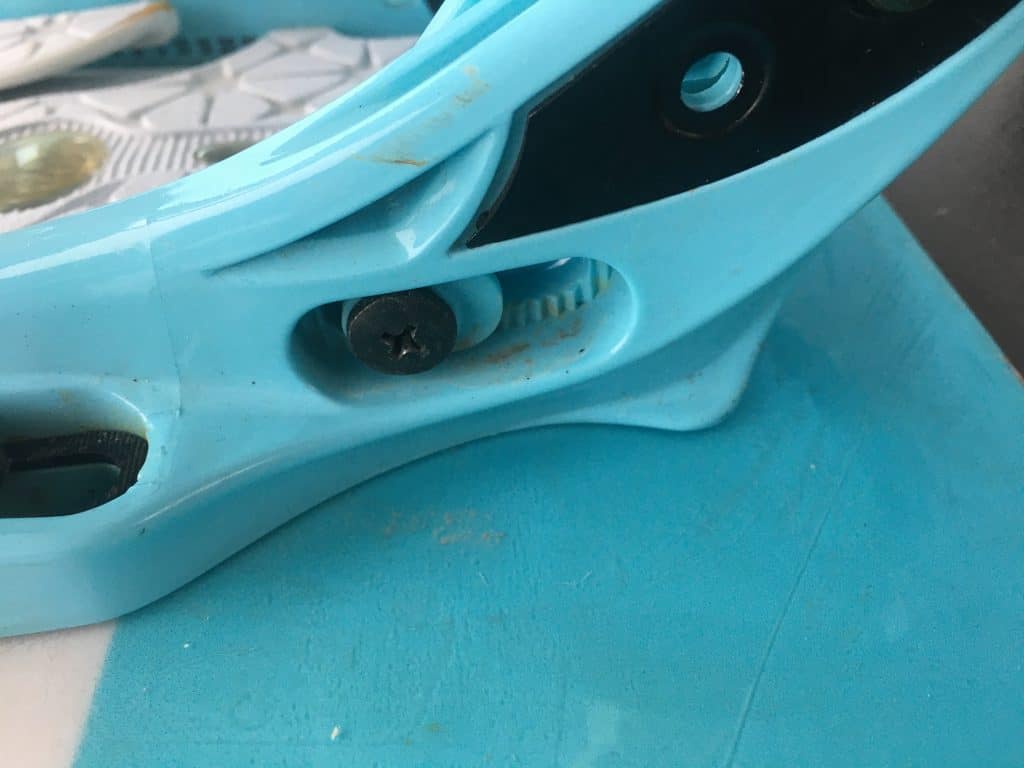
Highback rotation
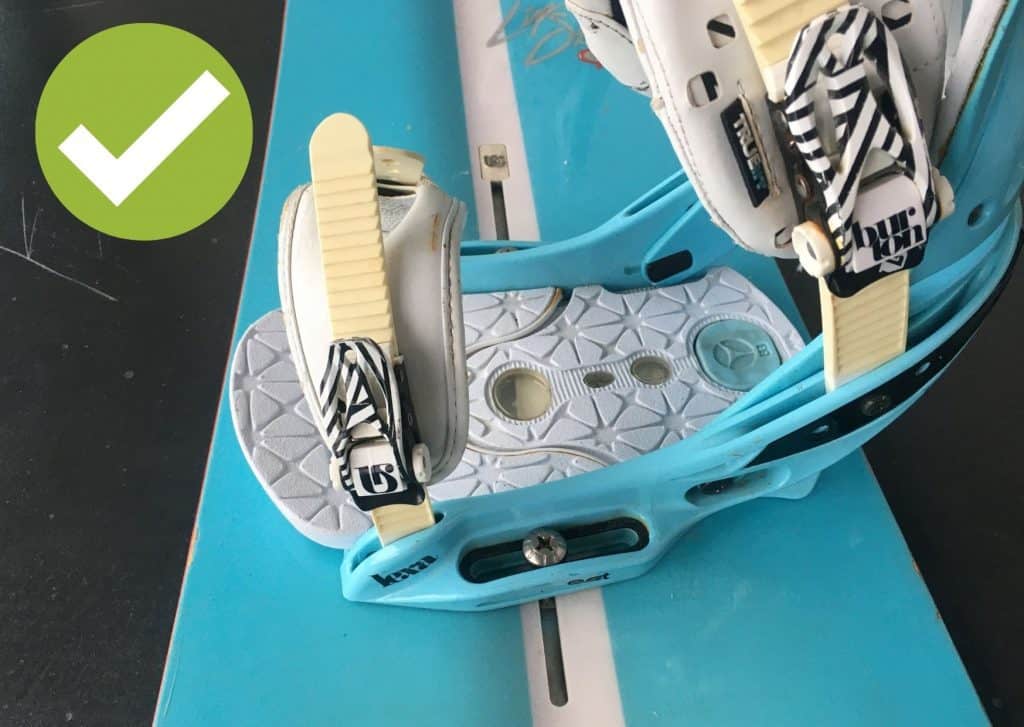
Binding highbacks can also be rotated. With the binding placed neutrally on the board, the highback sits parallel to the heel edge. However, when the binding is turned to a positive or negative stance angle, the highback also turns. It’s preferable to have the highback lined-up parallel to the heel edge so that all the power is transferred through the heel edge of the snowboard.
The highback rotation can be adjusted through two screws either side of the heelcup.
More Minor Snowboard Stance Adjustments
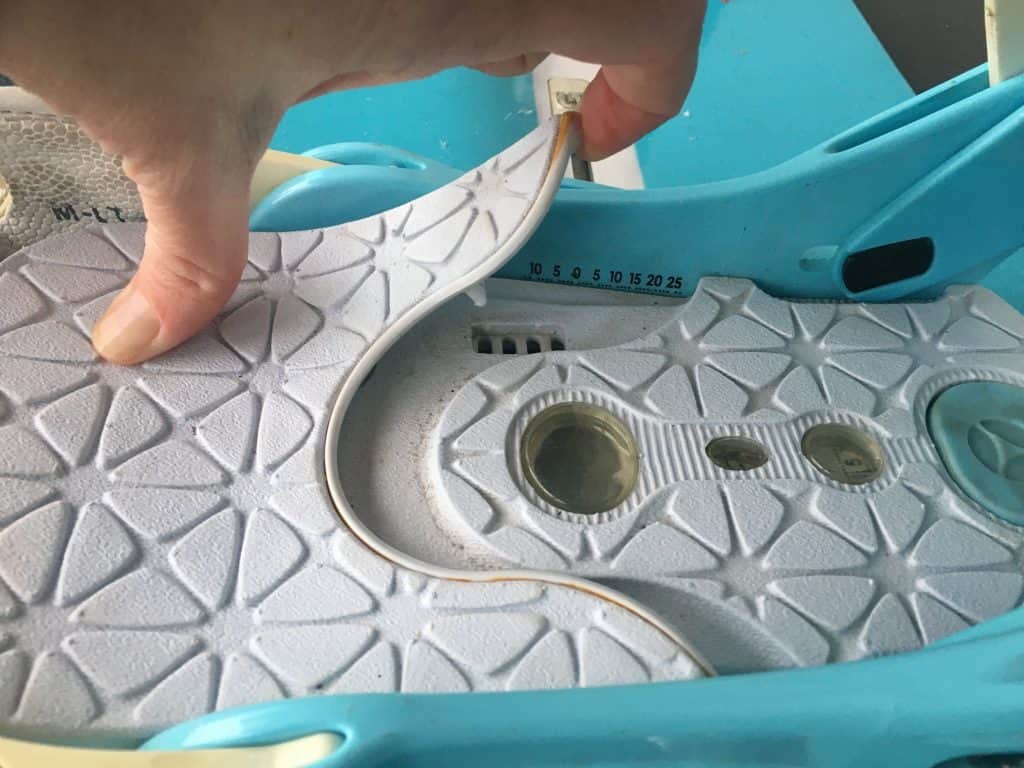
Adjust the snowboard binding footbed
Bindings have an extendable footbed so that the board fits comfortably in the binding without any overhang. This is particularly true if your boot size is at the limit of the corresponding binding size.
To learn more about selecting the correct binding size, click here.
The footbed may be held in place by clips or with a screw, so unclip or unscrew and adjust the footbed so that it lines up correctly with your boot.
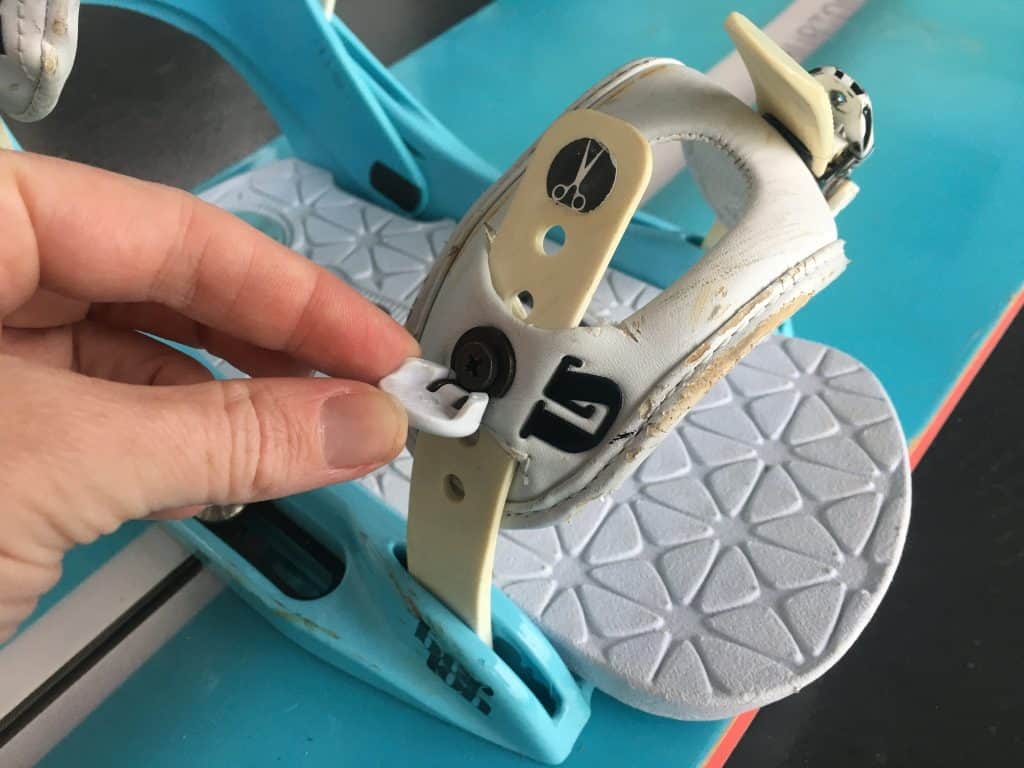
Adjust the snowboard binding straps
Finally you need to adjust the toe and ankle strap so that they sit centred on top of your boot and can be ratcheted into place comfortably. The straps can be shortened or lengthened through moving them into the most appropriate hole and are held in place with a screw.
The Best Beginner Snowboard Stance
When you first start snowboarding, the stance is likely to feel awkward and unusual. This is completely normal as it takes time for the body to adjust to new movements. But whilst you might feel awkward you should never be feeling any pain with your snowboard stance.
There is a lot of information to get through in this guide, so for quick reference as a beginner I would recommend the following snowboard stance settings:
- Use the reference stance on the snowboard (centred on a true twin board or slightly setback on a directional board)
- Use the stance width which corresponds to your height (using the chart above)
- Use stance angles +15/0 or +15/-3
- Use zero forward lean and ensure the highbacks are parallel to the heel edge of the snowboard
As a beginner you might also consider the use of a stomp pad in front of the back binding to make one-footed riding easier. Read this stomp pad guide to learn more.
How to Attach Bindings on a Snowboard
Once you’ve determined how you want your snowboard stance to be, you can attach the bindings to the snowboard. How exactly this is done will depend on the mounting system of your snowboard.
On the traditional mounting system there are four screws on each binding, on the Burton 3-D system there are three screws on each binding and on the Channel system there are two screws on each binding.
I explain more about snowboard binding mounting systems in this article about choosing snowboard bindings.
Traditional snowboard binding setup (2×4, 4×4, 3-D)
Take the correct disc from your binding that correlates to the snowboard mounting system. (Basically make sure the holes on your binding match the holes on your snowboard). Determine the nose and tail of the board and ensure your front foot ie the foot you want pointing down the hill, is the foot closest to the nose.
Measure out your stance width and either keep it centred for twin riding or set it back for directional riding. Set the correct angles on your base plate and tighten the screws loosely. Check the positioning of the binding across the board is ok and fully tighten the screws. Be careful not to over-tighten!
Now the binding is in place you can adjust the rotation on the highback, along with the forward lean. Place your boots in the binding and tighten up the straps. If the straps aren’t sitting centred over your boot, make the final adjustments to the ladders.
Now you’re all set to hit the slopes!
Related reading
The Channel binding setup
With the channel system the first few steps are slightly different since there is no disc in the baseplate (assuming you have EST bindings). The EST bindings come with a bar underneath the footbed which slots into the channel. On top of the footbed there is a clear bubble through which you can view the marked reference stance on the board.
Slide the binding to your desired stance width and setback. There is another smaller bubble which displays the binding angle. Whilst keeping the binding held in place, rotate the binding to your desired angles. Finally, slide the binding towards the toe edge or heel edge to make sure the binding is centred across the snowboard the width of the board. Tighten the screws in place.
Highback and strap adjustments are made in the same way as described above.
How To Set Up Snowboard Bindings Summary
There’s no such thing as the ultimate snowboard stance or a secret formula which will turn you into an incredible snowboarder! It’s all about trial and error and learning what works best for you. Just because all the cool kids in the park are riding +15/-15 doesn’t mean that will work for you too.
Having a good understanding of all the different elements involved in a snowboard setup and knowing how how each will affect your riding, will allow you to discover your own perfect snowboarding stance.
Louise is CASI snowboard instructor and certified rental technician. For the last 20 years Louise has lived and worked at ski resorts in Canada, Italy, Japan and the USA.